아키텍쳐

아직 전 포스트를 읽지 않은 사람은 어서 읽고도록 하자
해당 포스트는 이전 포스트와 이어진다. 반드시 그렇게 하도록 하자
EKS환경 구축
단계
- VPC yaml 작성 및 생성
- EKS Cluster yaml 작성 및 생성
- EKS Cluster에서 LoadBalancer Controller 설치
- ArgoCD생성 및 포트포워딩
VPC yaml 작성 및 생성
Description:  This template deploys a VPC, with a pair of public and private subnets spread
  across two Availability Zones. It deploys an internet gateway, with a default
  route on the public subnets. It deploys a pair of NAT gateways (one in each AZ),
  and default routes for them in the private subnets.

Parameters:
  EnvironmentName:
    Description: eks
    Type: String

  VpcCIDR:
    Description: Please enter the IP range (CIDR notation) for this VPC
    Type: String
    Default: 10.0.0.0/16

  PublicSubnet1CIDR:
    Description: Please enter the IP range (CIDR notation) for the public subnet in the first Availability Zone
    Type: String
    Default: 10.0.10.0/24

  PublicSubnet2CIDR:
    Description: Please enter the IP range (CIDR notation) for the public subnet in the second Availability Zone
    Type: String
    Default: 10.0.11.0/24

  PrivateSubnet1CIDR:
    Description: Please enter the IP range (CIDR notation) for the private subnet in the first Availability Zone
    Type: String
    Default: 10.0.20.0/24

  PrivateSubnet2CIDR:
    Description: Please enter the IP range (CIDR notation) for the private subnet in the second Availability Zone
    Type: String
    Default: 10.0.21.0/24

Resources:
  VPC:
    Type: AWS::EC2::VPC
    Properties:
      CidrBlock: !Ref VpcCIDR
      EnableDnsSupport: true
      EnableDnsHostnames: true
      Tags:
        - Key: Name
          Value: !Ref EnvironmentName

  InternetGateway:
    Type: AWS::EC2::InternetGateway
    Properties:
      Tags:
        - Key: Name
          Value: !Ref EnvironmentName

  InternetGatewayAttachment:
    Type: AWS::EC2::VPCGatewayAttachment
    Properties:
      InternetGatewayId: !Ref InternetGateway
      VpcId: !Ref VPC

  PublicSubnet1:
    Type: AWS::EC2::Subnet
    Properties:
      VpcId: !Ref VPC
      AvailabilityZone: !Select [ 0, !GetAZs '' ]
      CidrBlock: !Ref PublicSubnet1CIDR
      MapPublicIpOnLaunch: true
      Tags:
        - Key: Name
          Value: !Sub ${EnvironmentName}-Public-Subnet-1

  PublicSubnet2:
    Type: AWS::EC2::Subnet
    Properties:
      VpcId: !Ref VPC
      AvailabilityZone: !Select [ 1, !GetAZs  '' ]
      CidrBlock: !Ref PublicSubnet2CIDR
      MapPublicIpOnLaunch: true
      Tags:
        - Key: Name
          Value: !Sub ${EnvironmentName}Public-Subnet-2

  PrivateSubnet1:
    Type: AWS::EC2::Subnet
    Properties:
      VpcId: !Ref VPC
      AvailabilityZone: !Select [ 0, !GetAZs  '' ]
      CidrBlock: !Ref PrivateSubnet1CIDR
      MapPublicIpOnLaunch: false
      Tags:
        - Key: Name
          Value: !Sub ${EnvironmentName}Private-Subnet-1

  PrivateSubnet2:
    Type: AWS::EC2::Subnet
    Properties:
      VpcId: !Ref VPC
      AvailabilityZone: !Select [ 1, !GetAZs  '' ]
      CidrBlock: !Ref PrivateSubnet2CIDR
      MapPublicIpOnLaunch: false
      Tags:
        - Key: Name
          Value: !Sub ${EnvironmentName}Private-Subnet-2

  NatGateway1EIP:
    Type: AWS::EC2::EIP
    DependsOn: InternetGatewayAttachment
    Properties:
      Domain: vpc

  NatGateway2EIP:
    Type: AWS::EC2::EIP
    DependsOn: InternetGatewayAttachment
    Properties:
      Domain: vpc

  NatGateway1:
    Type: AWS::EC2::NatGateway
    Properties:
      AllocationId: !GetAtt NatGateway1EIP.AllocationId
      SubnetId: !Ref PublicSubnet1

  NatGateway2:
    Type: AWS::EC2::NatGateway
    Properties:
      AllocationId: !GetAtt NatGateway2EIP.AllocationId
      SubnetId: !Ref PublicSubnet2

  PublicRouteTable:
    Type: AWS::EC2::RouteTable
    Properties:
      VpcId: !Ref VPC
      Tags:
        - Key: Name
          Value: !Sub ${EnvironmentName}Public-Routes

  DefaultPublicRoute:
    Type: AWS::EC2::Route
    DependsOn: InternetGatewayAttachment
    Properties:
      RouteTableId: !Ref PublicRouteTable
      DestinationCidrBlock: 0.0.0.0/0
      GatewayId: !Ref InternetGateway

  PublicSubnet1RouteTableAssociation:
    Type: AWS::EC2::SubnetRouteTableAssociation
    Properties:
      RouteTableId: !Ref PublicRouteTable
      SubnetId: !Ref PublicSubnet1

  PublicSubnet2RouteTableAssociation:
    Type: AWS::EC2::SubnetRouteTableAssociation
    Properties:
      RouteTableId: !Ref PublicRouteTable
      SubnetId: !Ref PublicSubnet2


  PrivateRouteTable1:
    Type: AWS::EC2::RouteTable
    Properties:
      VpcId: !Ref VPC
      Tags:
        - Key: Name
          Value: !Sub ${EnvironmentName}Private-Routes-1

  DefaultPrivateRoute1:
    Type: AWS::EC2::Route
    Properties:
      RouteTableId: !Ref PrivateRouteTable1
      DestinationCidrBlock: 0.0.0.0/0
      NatGatewayId: !Ref NatGateway1

  PrivateSubnet1RouteTableAssociation:
    Type: AWS::EC2::SubnetRouteTableAssociation
    Properties:
      RouteTableId: !Ref PrivateRouteTable1
      SubnetId: !Ref PrivateSubnet1

  PrivateRouteTable2:
    Type: AWS::EC2::RouteTable
    Properties:
      VpcId: !Ref VPC
      Tags:
        - Key: Name
          Value: !Sub ${EnvironmentName}Private-Routes-2

  DefaultPrivateRoute2:
    Type: AWS::EC2::Route
    Properties:
      RouteTableId: !Ref PrivateRouteTable2
      DestinationCidrBlock: 0.0.0.0/0
      NatGatewayId: !Ref NatGateway2

  PrivateSubnet2RouteTableAssociation:
    Type: AWS::EC2::SubnetRouteTableAssociation
    Properties:
      RouteTableId: !Ref PrivateRouteTable2
      SubnetId: !Ref PrivateSubnet2

  NoIngressSecurityGroup:
    Type: AWS::EC2::SecurityGroup
    Properties:
      GroupName: "no-ingress-sg"
      GroupDescription: "Security group with no ingress rule"
      VpcId: !Ref VPC

Outputs:
  VPC:
    Description: A reference to the created VPC
    Value: !Ref VPC

  PublicSubnets:
    Description: A list of the public subnets
    Value: !Join [ ",", [ !Ref PublicSubnet1, !Ref PublicSubnet2 ]]

  PrivateSubnets:
    Description: A list of the private subnets
    Value: !Join [ ",", [ !Ref PrivateSubnet1, !Ref PrivateSubnet2 ]]

  PublicSubnet1:
    Description: A reference to the public subnet in the 1st Availability Zone
    Value: !Ref PublicSubnet1

  PublicSubnet2:
    Description: A reference to the public subnet in the 2nd Availability Zone
    Value: !Ref PublicSubnet2

  PrivateSubnet1:
    Description: A reference to the private subnet in the 1st Availability Zone
    Value: !Ref PrivateSubnet1

  PrivateSubnet2:
    Description: A reference to the private subnet in the 2nd Availability Zone
    Value: !Ref PrivateSubnet2

  NoIngressSecurityGroup:
    Description: Security group with no ingress rule
    Value: !Ref NoIngressSecurityGroup
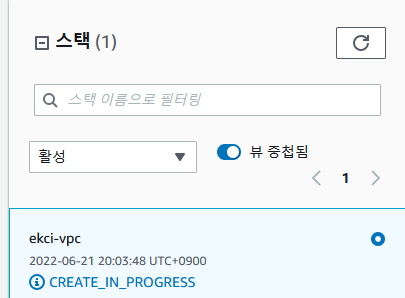
위 yaml 코드를 그대로 복사하고 붙여넣기해서 cloudformation에서 생성하도록 한다.


이렇게 생성을 진행하도록 한다.
이제 생성되는 사이 Cluster를 만들 manifast파일을 생성하자.
apiVersion: eksctl.io/v1alpha5
kind: ClusterConfig

metadata:
  name: ekci-cl
  region: ap-northeast-2

vpc:
  subnets:
    public:
      ap-northeast-2a: { id:  }
      ap-northeast-2b: { id:  }
    private:
      ap-northeast-2a: { id:  }
      ap-northeast-2b: { id:  }

nodeGroups:
  - name: ng-group
    labels: { role: workers }
    instanceType: t3.large
    desiredCapacity: 2
    privateNetworking: true
    volumeSize: 50
subnet 뒤에 id 부분은 남겨두고 VPC가 전부 생성되면 Public과 Private에 맞게 각각의 subnet id를 붙여넣는다.

그 뒤 EKS cluster를 생성해준다.
eksctl create cluster -f cluster.yaml그 뒤 20분 정도 기다리면 생성이 완료가 되어있다. 연결을 해주도록 하자
aws eks update-kubeconfig --name ekci-cl --region ap-northeast-2연결을 완료하고 나서 LoadBalancer Controller를 설치해주어야 한다.
설치하기 앞서 OIDC 공급자부터 만들어준다.
eksctl utils associate-iam-oidc-provider --cluster my-cluster --approve이제 Helm을 설치하고 오도록 한다.(이 글에서는 설명하지 않는다.)
우선 IAM정책을 다운받고 생성해주도록 한다.
curl -o iam_policy.json https://raw.githubusercontent.com/kubernetes-sigs/aws-load-balancer-controller/v2.4.0/docs/install/iam_policy.json
aws iam create-policy --policy-name AWSLoadBalancerControllerIAMPolicy --policy-document file://iam_policy.json
그 다음 IAM 역할을 만들어야 한다.
<account_number>부분은 자신의 값으로 넣는다.
eksctl create iamserviceaccount --cluster=ekci-cl --namespace=kube-system --name=aws-load-balancer-controller --attach-policy-arn=arn:aws:iam::<account_number>:policy/AWSLoadBalancerControllerIAMPolicy --override-existing-serviceaccounts --approve
Helm을 사용해 eks chart를 추가한 뒤 업데이트 그리고 설치까지한다.
helm repo add eks https://aws.github.io/eks-charts
helm repo update
helm install aws-load-balancer-controller eks/aws-load-balancer-controller -n kube-system --set clusterName=ekci-cl --set serviceAccount.create=false --set serviceAccount.name=aws-load-balancer-controller
모든 설치가 완료되었고 마지막 확인을 한다.
kubectl get deployment -n kube-system aws-load-balancer-controller
대부분 UP-TO-DATE가 2인경우 성공한다고 보면 된다.
이제 IRSA라는 것을 사용할건데
IRSA는 파드별로 권한을 주는 것이라고 생각하면 된다.
정확히는 ServiceAccount를 하나 생성하고 생성한 ServiceAccount와 IAM account를 연결해주는 작업이다.
하나의 pod는 하나의 service account만을 지닐 수 있다. 이부분 유의하도록 하자.
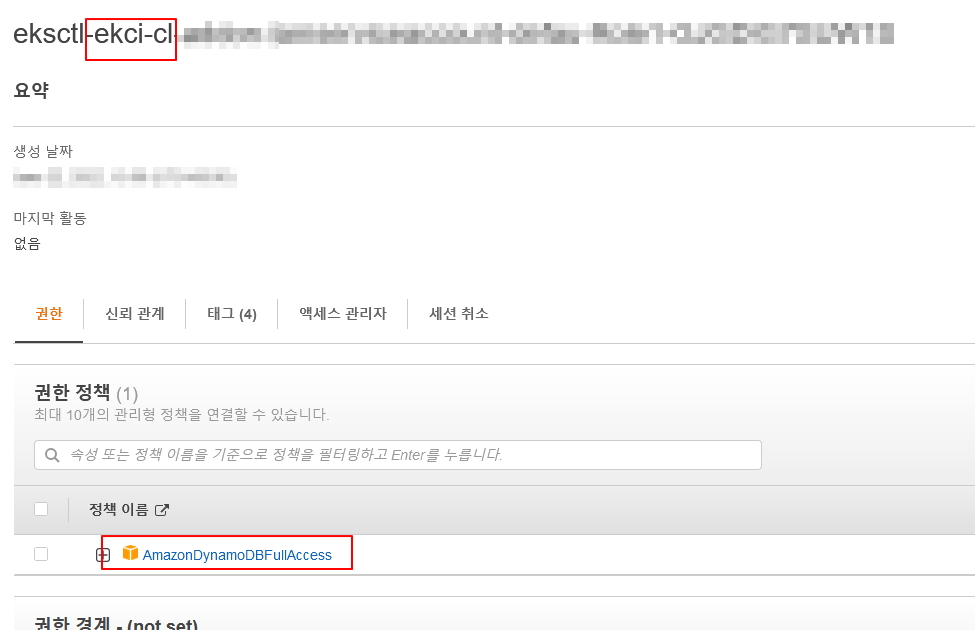
eksctl create iamserviceaccount --cluster=ekci-cl --name=ekci-irsa --attach-policy-arn=arn:aws:iam::aws:policy/AmazonDynamoDBFullAccess --approve그 뒤 확인을 해보자.
kubectl get serviceaccount당연히 있어야하고 IAM 역할탭으로 가서도 확인해보도록 하자.

잘 적용 되었다.
오늘은 끝
두번째 포스팅도 끝!
다음 포스트에서는 ArgoCD를 생성할 것이다.
현재 포스트에서 생성한 서비스는 나는 종료할 것이지만 이어서 하는 사람은
삭제하면 큰일 난다.